
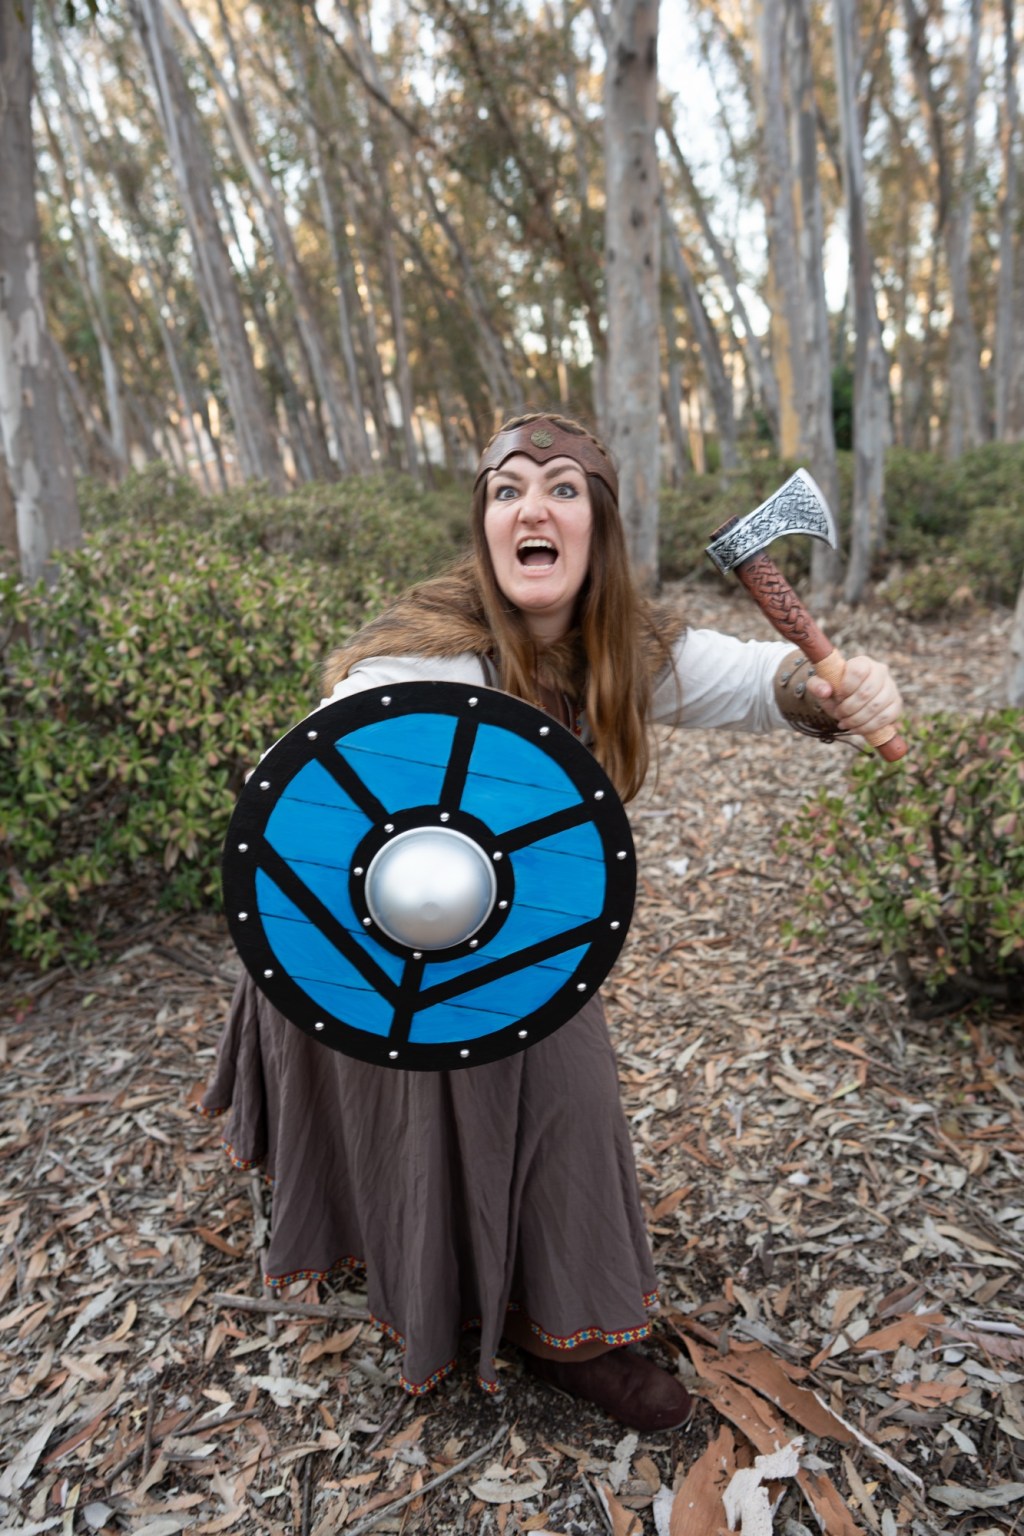
I made these Viking shield wall decorations, which can also be shields for cosplay if you attach a strap to the back. Let me walk you through how it was done so you can make one, too!

Materials:
- A blank wooden circle sign. In these examples, the small one was 12 inches and the large one was 18 inches. (example, but there are a lot of options out there)
- Mod Podge (link) and a foam brush to apply it (link).
- Acrylic paints and brushes (any colors/types you like)
- Optional: acrylic paint pens for detailing (any colors you like)
- Optional: silver half pearls for crafts (or another color…up to you!) (link)
- B-7000 glue or any other glue that sticks well to metal and wood (link)
- Metal dome (or a wooden dome you paint silver would work). I used a metal dome cake mold, 4 inches for the small shield and 5 inches for the larger one. (link)
- Optional if you want to add a strap or handle to hang: staple gun and a strap of a strong material such as faux leather, burlap, etc.
You can see my process in the video above, but I’ll describe to you below so you can have more details…
Start out by drawing your preferred design on to the wooden circle so you can plan it out. This part is very forgiving as you’ll paint over it, so if you make mistakes at this point, that’s ok! Make sure you find the center of the shield so you can plan where you will glue your metal dome once the painting is finished.
Once you have it all planned out, I find it’s useful to first apply a layer of Mod Podge to the design to prime it. If you’re planning on stapling a strap to the back as well, this would be a great time to do so (before you add the metal dome. I suggest stapling it under where the dome will go so the staples won’t be visible). I didn’t add a strap to the back, but one of my friends did when she made hers and it was a nice addition. I did use mine for a photo shoot, but I just made a temporary Duct tape strap for the photos since my plan was to have this be primarily a wall hanging. It’s up to you!
Once your design is all planned out and you’ve sealed it with mod podge, now you can start painting with acrylics. I recommend painting larger areas with regular paint and brushes, and if you want to add any fine details to the design, adding those after the first layer dries with acrylic marker pens, which give you much more control. You can design it in any shapes/colors you like!
When the paint is complete and everything is dry, add another layer of mod podge to the painting in order to seal it.
After that dries, you’ll want to glue your metal dome onto the shield. I used B-7000 glue, but you can probably use any glue that will stick well to both wood and metal. I can warn you that I originally tried it with hot glue and it did NOT stick at all, so learn from my mistake and don’t use hot glue. The B-7000 is made for jewelry, so it’s a smaller container. I had to really squeeze a lot to get enough glue on, but it’s what I had on hand and I’m happy to report that once it was dry, it has stayed on really well. So I know B-7000 works, but you can try other glues depending on what you have on hand and what might work well. Make sure to use plenty of glue so it will adhere well. After gluing, leave it laying flat so it can fully dry.
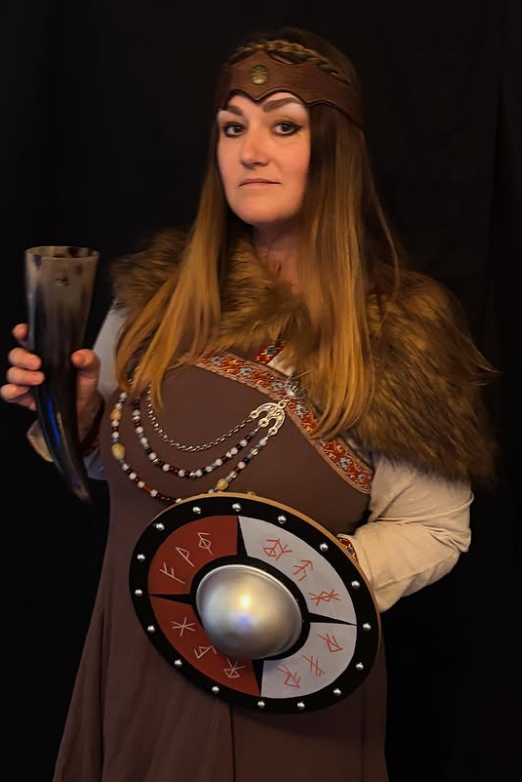
You can also add other embellishments if you want, such as this one I made with smaller half-dome pearls to add extra details. Totally optional if you like the look of it.
And that’s it! Once it’s all dry, you’re ready to live your best Viking life! If you make this craft, please share a photo with me. I would love to see your creativity!


Leave a comment